Software
Documentation
Creating an RSS Gadget
You can easily create a gadget that displays the contents of an RSS feed. This tutorial tells you how, using the RSS Demo gadget that's included in the Google Desktop SDK. You make a few changes to the gadget's code, customize its strings, and optionally customize some images. When the gadget is complete you can submit it, making it available to millions of Google Desktop users.
Contents
- Overview
- Step 1: Download and Install Software
- Step 2: Make a Copy of the RSS Demo Gadget
- Step 3: Run the RSS Demo Gadget
- Step 4: Set Configuration Constants
- Step 5: Customize Strings, Metadata, and Images
- Step 6: Package Your Gadget
- Step 7: Publish Your Gadget
- What Next?
Overview
To create your gadget, you need just two things:
- An RSS or Atom feed
- This feed supplies the headlines and content for your RSS gadget.
- A public name for your gadget
- This name appears on websites and in the gadget.
If possible, you should also have these:
- An image with transparency to use as the logo for your gadget
- This image appears centered at the top of your gadget's main view, making your gadget look different from other gadgets based on the RSS Demo gadget. As a rule, this image should be no more than 29 pixels tall and 90 pixels wide.
- A web page describing your gadget.
- This page should show your gadget and help convince users to download it.
![]()
![]() You might also want large and small icons for your gadget,
if you don't want to use the default icons shown to the right.
The small icon is a 24x24-pixel PNG image (with transparency)
that's used to represent the gadget,
such as when the gadget is collapsed.
The large icon is 32x32-pixel PNG image used in the gadget's About box.
You might also want large and small icons for your gadget,
if you don't want to use the default icons shown to the right.
The small icon is a 24x24-pixel PNG image (with transparency)
that's used to represent the gadget,
such as when the gadget is collapsed.
The large icon is 32x32-pixel PNG image used in the gadget's About box.
It's OK if you don't have everything yet. The RSS Demo gadget can run without being customized, so you can get started despite missing pieces.
Step 1: Download and Install Software
This tutorial uses the RSS Demo gadget that's included in the Google Desktop SDK. To run the gadget, you must have Google Desktop installed.
Do this:
- If you're not already running Google Desktop, download Google Desktop and install it.
- Download the SDK. This tutorial assumes you have the most recent version of the RSS Demo gadget.
- Unzip the SDK archive and put it somewhere convenient.
Step 2: Make a Copy of the RSS Demo Gadget
Do this:
- Make a copy of the SDK's
api/samples/gadgets/rssfolder, giving it a unique name that reflects the gadget's public name. (You can change the name later.) This tutorial uses the folder nameMyCompanyFeed. - Put your folder in a convenient place.
The RSS Demo gadget is implemented using many files, but you don't need to know anything about most of them. The following table shows the files you're likely to change.
| File Name | Type | Description |
|---|---|---|
editme/config_constants.js |
JavaScript source file | Defines RSS gadget constants such as the feed URL, feed refresh interval, directory containing the gadget skin's images, and so on. |
en/strings.xml |
XML file | Defines strings used by the default, English version of this gadget. If you want to specify strings for other languages, see the gadget API documentation's discussion of Internationalization. |
gadget.gmanifest |
Google Desktop manifest file | Specifies the gadget's metadata, such as its ID and version. |
icon_large.png |
image | Your gadget's 32x32-pixel icon. |
icon_small.png |
image | Your gadget's 24x24-pixel icon. |
default/frame_TopLogo.png |
image | The logo that appears at the top of the main view of the RSS gadget. |
default/theme_config.xml |
XML | Specifies the background color of the item currently under the cursor. |
default/title.xml |
XML | Specifies elements — such as title text or a logo — that are displayed in the title area. |
Step 3: Run the RSS Demo Gadget
The next step is to run your copy of the RSS Demo gadget, both to make sure it works and to see what it does.
Do this:
-
Open your gadget's folder
(for example,
MyCompanyFeed). -
Double-click the
gadget.gmanifestfile. You should see an installation dialog.

If you have any problems running your copy of the gadget, try these steps:- Open the SDK's
api/samples/gadgets/rssfolder. - Double-click the folder's
gadget.gmanifestfile. - If the SDK copy of the RSS Demo gadget successfully starts,
then your environment and the SDK are OK;
the problem must be in your copy of the gadget.
Make sure your gadget's folder has all the files
in the original
rssfolder. - If you can't run the SDK copy of the RSS Demo gadget, download the SDK again and try again to run its copy of the RSS Demo gadget.
- If you still can't run the RSS gadget, reinstall the latest version of Google Desktop from http://desktop.google.com and try again.
- Open the SDK's
-
Click OK in the installation dialog.
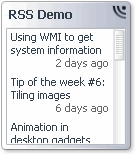
You should now see the the RSS Demo gadget,
either in the sidebar
(if the Google Desktop sidebar is visible)
or on your desktop.

-
Click an item in the gadget.
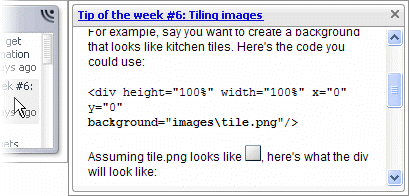
A details view appears.

- Click the details view's title. The details view closes, and the page for the item — a blog post or article, for example — appears in a browser.
- Double-click an item in the gadget. The page for the item appears in a browser, just as if you clicked the details view's title.
Now that you've seen what the RSS Demo gadget does, it's time to customize it.
Step 4: Set Configuration Constants
The file editme/config_constants.js
defines several constants that you can change
to customize your gadget.
The most important one defines the address of the RSS feed.
It looks like this:
// OLD code
var CONFIG_FEED_URL = 'http://googledesktopapis.blogspot.com/atom.xml';
Do this:
- Get the URL for your newsfeed.
- Make sure the URL works by copying it into a browser window and looking at the results.
- Open
editme/config_constants.jsin a text editor that can handle UNIX-style line endings. (WordPad works; NotePad doesn't.) - Edit the file
so that
CONFIG_FEED_URLis set to the newsfeed's URL.// NEW code var CONFIG_FEED_URL = 'http://your-feed-address-goes-here';
-
Launch the gadget by double-clicking its
gadget.gmanifestfile. -
Make sure the gadget displays the newsfeed correctly, in both the main view and the details view.
If the gadget doesn't display the newsfeed correctly, please let us know:
-
Run the console
(
sdk/api/tools/gdpconsole.exe) to get error messages. - Send the error message text, the URL of the newsfeed, and a description of the problem to gd-developer AT google DOT com.
Note: If you're willing to change JavaScript code, you can try to fix the problem by editing the
parseFeed()function ineditme/entry_item_impl.js. -
Run the console
(
-
Optionally, change other configuration parameters. For example, you can set the value of
CONFIG_REFRESH_FEED_MSto update your gadget's items more or less often than the default once per hour.
Step 5: Customize Strings, Metadata, and Images
In this step, you edit two files to customize your gadget's strings and give it a unique ID. Then if you have custom images, you put them in the gadget. Finally, you can adjust the color of your gadget.
Do this:
- Open
gadget.gmanifestin a text editor. - Generate a unique identifier for your gadget. You can find an ID generator by searching for [uuid generator].
- Change the
<id>value ingadget.gmanifestto be the unique identifier you just generated. - Update other
gadget.gmanifestvalues, such as<author>,<authorWebsite>,<copyright>, and<authorEmail>. For information about these elements, see the gadget.gmanifest documentation. - Save your work.
- In the
enfolder, open thestrings.xmlfile in your text editor. - Update
strings.xmlwith the gadget's new name, description, and "about" information. You can also change other strings, if you like. Here's an example, with changed text in orange:... <strings> <GADGET_NAME>News from My Company</GADGET_NAME> <GADGET_DESCRIPTION>Hear the latest news from My Company</GADGET_DESCRIPTION> <GADGET_ABOUT_TEXT>News from My Company Copyright 2007 Google Inc. Licensed under the Apache License, Version 2.0 http://www.apache.org/licenses/LICENSE-2.0 Modifications copyright 2007 My Company All Rights Reserved. Keep up with the latest news about My Company. To see a news release's full text, just click its headline. For more information about My Company, go to http://example.com. </GADGET_ABOUT_TEXT> ... <TITLE_TEXT>My Company News</TITLE_TEXT> </strings>
Note: Because space in the title area is limited, the value of
TITLE_TEXT, if any, must be short. - Save your work.
- If you have a custom logo image,
save it in the
defaultfolder asframe_TopLogo.png. - If you have custom large and small icons,
save them in the gadget's top folder as
icon_large.pngandicon_small.png, respectively. - If you want to change the background color of the item
that the user's cursor is over,
modify the
<entryHoverBkg>element in the filedefault/theme_config.xml. You can find help with hexadecimal color codes by searching for [hexadecimal color -safe]. Here's an example of changing the color to light green:<entryHoverBkg>#e2fcbc</entryHoverBkg>
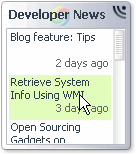
The following snapshot shows a gadget
that has a custom title, logo, and background color.
The value of <TITLE_TEXT> is
Developer News,
the top logo is a transparent Google Desktop icon,
and the value of <entryHoverBkg> is #e2fcbc.
Note that the title area isn't wide enough for a longer name,
such as "Google Desktop Developer News".
Fortunately, the logo makes the "Google Desktop" string redundant.

Step 6: Package Your Gadget
So far, you've been running your gadget
by double-clicking its gadget.gmanifest file.
That's fine while you're debugging,
but a finished gadget needs to be packaged into a single file
for distribution.
In this step, you create a .gg package —
a ZIP archive
of the files that define your gadget's appearance and behavior.
You can then double-click the .gg file
to run the gadget.
Do this:
- Remove any unnecessary files from your gadget's folder.
For example, remove automatically created backup
and
Thumbs.dbfiles. - Create a ZIP archive of the files and folders
that are inside your gadget's folder.
On Windows, you can do this by selecting
everything in the folder,
right-clicking a file,
and choosing Send To > Compressed (zipped) Folder.
Note: The structure of the ZIP file should match the structure of your gadget's folder. For example,
gadget.gmanifestandmain.xmlshould be at the top level of the ZIP file, not in a folder. - Change the ZIP file's name to have a
.ggextension (for example,MyCompanyFeed.gg). - Put your gadget's
.ggfile in a convenient place outside of your gadget's folder — for example, on your computer's desktop. - Double-click the
.ggfile. If your gadget starts running, you're ready to do final testing. - Test your gadget. Give your gadget to a few friends, coworkers, or fellow developers to test. See the Gadget Design and Testing Guidelines for help.
Step 7: Publish Your Gadget
In this step, you make your gadget available for download by users. These instructions tell you how to submit the gadget to Google, so your gadget is available to millions of users.
Do this:
- Take large (300x255) and small (80x60) screenshots of your gadget. These images can show part or all of your gadget.
- Upload your gadget's
.ggfile and screenshots to a publicly visible website.
If your gadget is open source, you can publish your files using Google Code Project Hosting. - Use the
Submit Software page
to submit your gadget to Google.
When submitting your gadget, you must supply the following information:- Your gadget's type (Desktop Gadget).
- The URL of the gadget's
.ggfile. - The URL of the gadget's large screenshot.
- The URL of the gadget's small screenshot.
- Your email address.
When your gadget submission is received, you get an email from Google. Keep this email — you'll need it later if you need to change the URL or screenshots for your gadget.
What Next?
If this was your first gadget, don't stop — make another! Follow another tutorial, visit the developer group, or read more about gadgets.